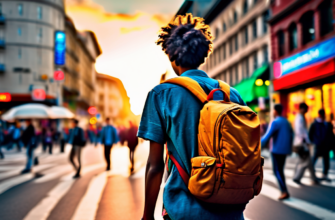
City landmarks are the jewels of any urban landscape, drawing millions of tourists eager to capture their beauty and share it with others. Whether it’s a towering skyscraper, historic monument, or famous bridge, photographing these sites requires a mixture of technical skill, artistic eye, and strategic planning. This comprehensive guide provides actionable tips and expert advice to help tourists elevate their cityscape photography, ensuring their travel memories are visually spectacular and truly unforgettable.
- Understanding the Basics of City Landmark Photography
- Why Great Photos Matter
- The Unique Challenges of Urban Photography
- Essential Equipment for Capturing City Landmarks
- Camera Choices
- Important Accessories
- Timing Your Photo Sessions for the Best Results
- Golden Hour and Blue Hour
- Golden Hour
- Blue Hour
- Avoiding Crowds and Traffic
- Composing Stunning Landmark Photos
- Understanding Composition Principles
- Creating Dynamic and Engaging Shots
- Technical Tips for Mastering City Landmark Photography
- Managing Light and Exposure
- Focus Strategies
- Night Photography and Long Exposures
- Post-Processing Techniques
- Enhancing Your Photos
- Using Editing Tools
- Special Tips for Capturing Iconic Landmarks
- Research and Planning
- Utilizing Surroundings
- Patience and Flexibility
- Examples of Popular City Landmarks and Best Photography Tips
- Turning Moments into Masterpieces
Understanding the Basics of City Landmark Photography
Why Great Photos Matter
Capturing impressive images of city landmarks does more than just preserve memories—it allows viewers to experience the magic and grandeur of these sites as if they were present in the moment. Well-composed photos can highlight architectural details, convey the scale and atmosphere, and evoke emotions that resonate long after the trip is over.
The Unique Challenges of Urban Photography
Unlike natural landscapes, city landmarks often involve complex compositions, diverse lighting conditions, and busy backgrounds. Overcoming these challenges requires a mix of technical mastery and creative vision, making it essential for travelers to understand key principles of urban photography.
Essential Equipment for Capturing City Landmarks
Camera Choices
- DSLR and Mirrorless Cameras: Offer the highest flexibility, manual controls, and image quality, ideal for serious photographers.
- Smartphones: Modern smartphones come equipped with powerful cameras, AI-based scene optimization, and convenient portability—perfect for casual travelers.
- Compact Cameras: Bridge cameras with zoom capabilities can cover a range of situations without heavy gear.
Important Accessories
- Tripod: Stabilizes the camera for long exposures, night shots, or precise compositions.
- Lenses: Wide-angle lenses (16-35mm) capture expansive cityscapes, while telephoto lenses (70-200mm) help isolate architectural details.
- Filters: Polarizing filters reduce reflections and enhance sky contrast, while ND filters allow long exposures during daylight.
- Extra Batteries and Memory Cards: Ensure you won’t miss shots due to power or storage issues.
Timing Your Photo Sessions for the Best Results
Golden Hour and Blue Hour
Golden Hour
The period shortly after sunrise and before sunset offers warm, soft lighting that enhances the textures and colors of buildings, making them appear more vibrant and inviting.
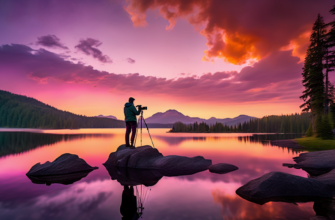
Blue Hour
The time just before sunrise and after sunset creates a moody, blue-tinted atmosphere, perfect for capturing city skylines with illuminated landmarks and reflective water surfaces.
Avoiding Crowds and Traffic
For clear shots without tourists or vehicles, aim for early mornings or late evenings. Weekdays often see fewer visitors, providing cleaner compositions and less disruption.
Composing Stunning Landmark Photos
Understanding Composition Principles
Good composition enhances the visual impact of city landmarks. Follow these fundamental principles:
- Rule of Thirds: Divide the frame into thirds both horizontally and vertically, placing key elements at intersections for balanced images.
- Leading Lines: Use roads, bridges, railings, or riverbanks to guide viewers’ eyes toward the main subject.
- Framing: Incorporate natural or architectural elements to frame the landmark, adding depth and context.
- Perspective: Experiment with different angles—shoot from low, high, or unusual viewpoints to reveal new aspects of familiar sights.
Creating Dynamic and Engaging Shots
Instead of static images, try to capture the energy of the city:
- Include foreground elements to add depth.
- Capture reflections in water or glass surfaces.
- Photograph during different weather conditions to convey mood.
- Use silhouettes during sunset or sunrise for dramatic effects.
Technical Tips for Mastering City Landmark Photography
Managing Light and Exposure
- Manual Mode: Control ISO, shutter speed, and aperture to adapt to changing lighting conditions.
- Exposure Bracketing: Take multiple shots at different exposures to combine into high dynamic range (HDR) images, capturing details in both shadows and highlights.
- White Balance: Adjust white balance settings to maintain natural colors under varying lighting conditions.
Focus Strategies
- Use autofocus with single-point focus for precise control on architectural details.
- Switch to manual focus in low-light conditions or when depth of field control is critical.
- Enable focus peaking (if available) for sharpness in critical areas.
Night Photography and Long Exposures
Cityscapes look dramatic at night, highlighting illuminated buildings and streets. To achieve stunning night shots:
- Use a tripod to stabilize the camera.
- Set a small aperture (f/8–f/16) for greater depth of field.
- Use longer shutter speeds (2–30 seconds) to capture sufficient light.
- Enable low ISO settings to minimize noise.
Post-Processing Techniques
Enhancing Your Photos
Photo editing allows you to correct minor issues and enhance visual appeal:
- Adjust Brightness and Contrast: Improve overall clarity and depth.
- Sharpening: Highlight details without over-sharpening.
- Color Correction: Fine-tune saturation, hue, and white balance for realistic or artistic effects.
- HDR Processing: Combine bracketed exposures for a balanced exposure in high-contrast scenes.
Using Editing Tools
Popular editing software includes Adobe Lightroom, Photoshop, and free alternatives like GIMP. Focus on non-destructive editing to preserve original files and experiment freely.
Special Tips for Capturing Iconic Landmarks
Research and Planning
Before visiting, research the best viewpoints, times, and weather conditions. Use apps like Google Maps, Instagram, or dedicated photography guides to find inspiration and optimal angles.
Utilizing Surroundings
Look for interesting nearby architecture, street art, or natural elements that complement the main landmark. Including local people adds life and context to the picture.
Patience and Flexibility
Sometimes, waiting for the right moment or lighting can make the difference between a good shot and a great one. Be prepared for changing conditions and explore different compositions.
Examples of Popular City Landmarks and Best Photography Tips
| Landmark | Location | Best Time | Key Tips |
|---|---|---|---|
| Empire State Building | New York City | Golden Hour, Night | Use wide-angle lens, shoot from observation decks or nearby rooftops for unique perspectives. |
| Eiffel Tower | Paris | Blue Hour, Night | Capture reflections on the Seine River, try different viewpoints from Trocadéro or Champ de Mars. |
| Sydney Opera House | Sydney | Sunset, Blue Hour | Experiment with long exposures during blue hour, include Opera House sails and Harbour Bridge. |
| Colosseum | Rome | Early Morning, Sunset | Use low-angle shots to emphasize size, include nearby ruins for context. |
Turning Moments into Masterpieces
Capturing awe-inspiring photos of city landmarks combines technical expertise with artistic insight. Through careful planning, understanding lighting and composition, and utilizing the right equipment, travelers can produce images that do justice to the beauty of the world’s most iconic sights. Patience, experimentation, and attention to detail transform ordinary snapshots into extraordinary visual stories, allowing tourists to relive their adventures long after their journey ends.
With these tips in hand, every traveler is equipped to photograph city landmarks with confidence and creativity, creating memorable images that stand the test of time.
Похожие записи:
 Ultimate Guide to Using Local Dining Apps with User Reviews and Tips for Hotel Holidays
  Ultimate Guide to Using Offline Maps and Guidebooks for Seamless Navigation During Hotel Holidays
  Ultimate Guide to Packing Entertainment for Hotel Holidays: Books, Podcasts, and Movies
  Mastering Local Transportation Cards: Your Ultimate Guide to Stress-Free Travel
 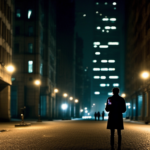 Essential Safety Tips for Tourists: Why You Should Avoid Walking Alone in Unfamiliar or Poorly Lit Areas at Night
  Ultimate Guide to Securing Your Valuables During Hotel Holidays: Safe Storage Tips for Tourists
  Ultimate Guide to Using Map Apps to Discover Nearby Eateries Based on Traveler Reviews
  Ultimate Guide to Verifying Safety and Cleanliness Standards of Hotels Before Booking
  Ultimate Guide: Bring Versatile Clothing for Different Weather Conditions During Your Hotel Holiday
  Ultimate Guide: Discover the Best Times to Visit Popular Eateries and Avoid Long Waits
  Ultimate Guide to Hotel Concierge Services: Curated Dining Recommendations for a Perfect Vacation
  Compare Prices Across Multiple Booking Sites Before Finalizing Your Reservation: Ultimate Guide for Savvy Travelers
  Ultimate Guide: Must-Have Items to Avoid Overpacking on Your Hotel Holidays
  Unlocking Insider Tips: How Reading Recent Travel Forums Can Elevate Your Hotel Holidays
  Stay Hydrated on Hotel Holidays: The Ultimate Guide to Using a Reusable Water Bottle
  Avoid Sharing Personal Travel Plans on Social Media in Real-Time: Essential Tips for Tourists on Hotel Holidays